The ShipStation Integration allows you to automatically sync orders, generate shipping labels, and display live carrier rates at checkout in your Ecommerce Store. Follow this guide to connect your ShipStation account with the Platform and streamline fulfillment.
Important: Shipstation Setup Checklist
Please check this article for the setup checklist for Shipstation:
/a/155000005635/ dir="ltr" style="font-family: Arial, Helvetica, sans-serif;">
Step 1: Install Ship Station Integration
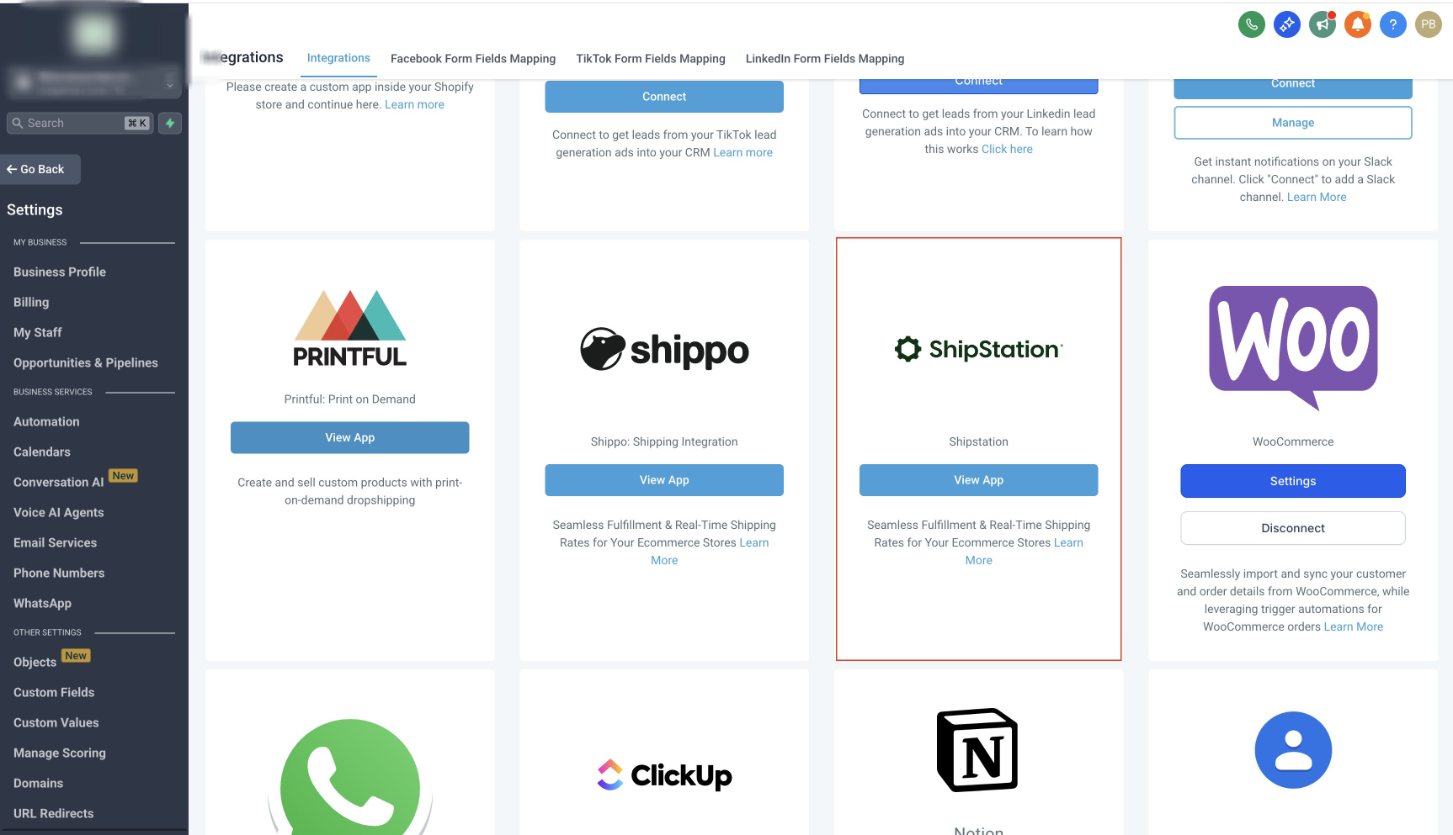
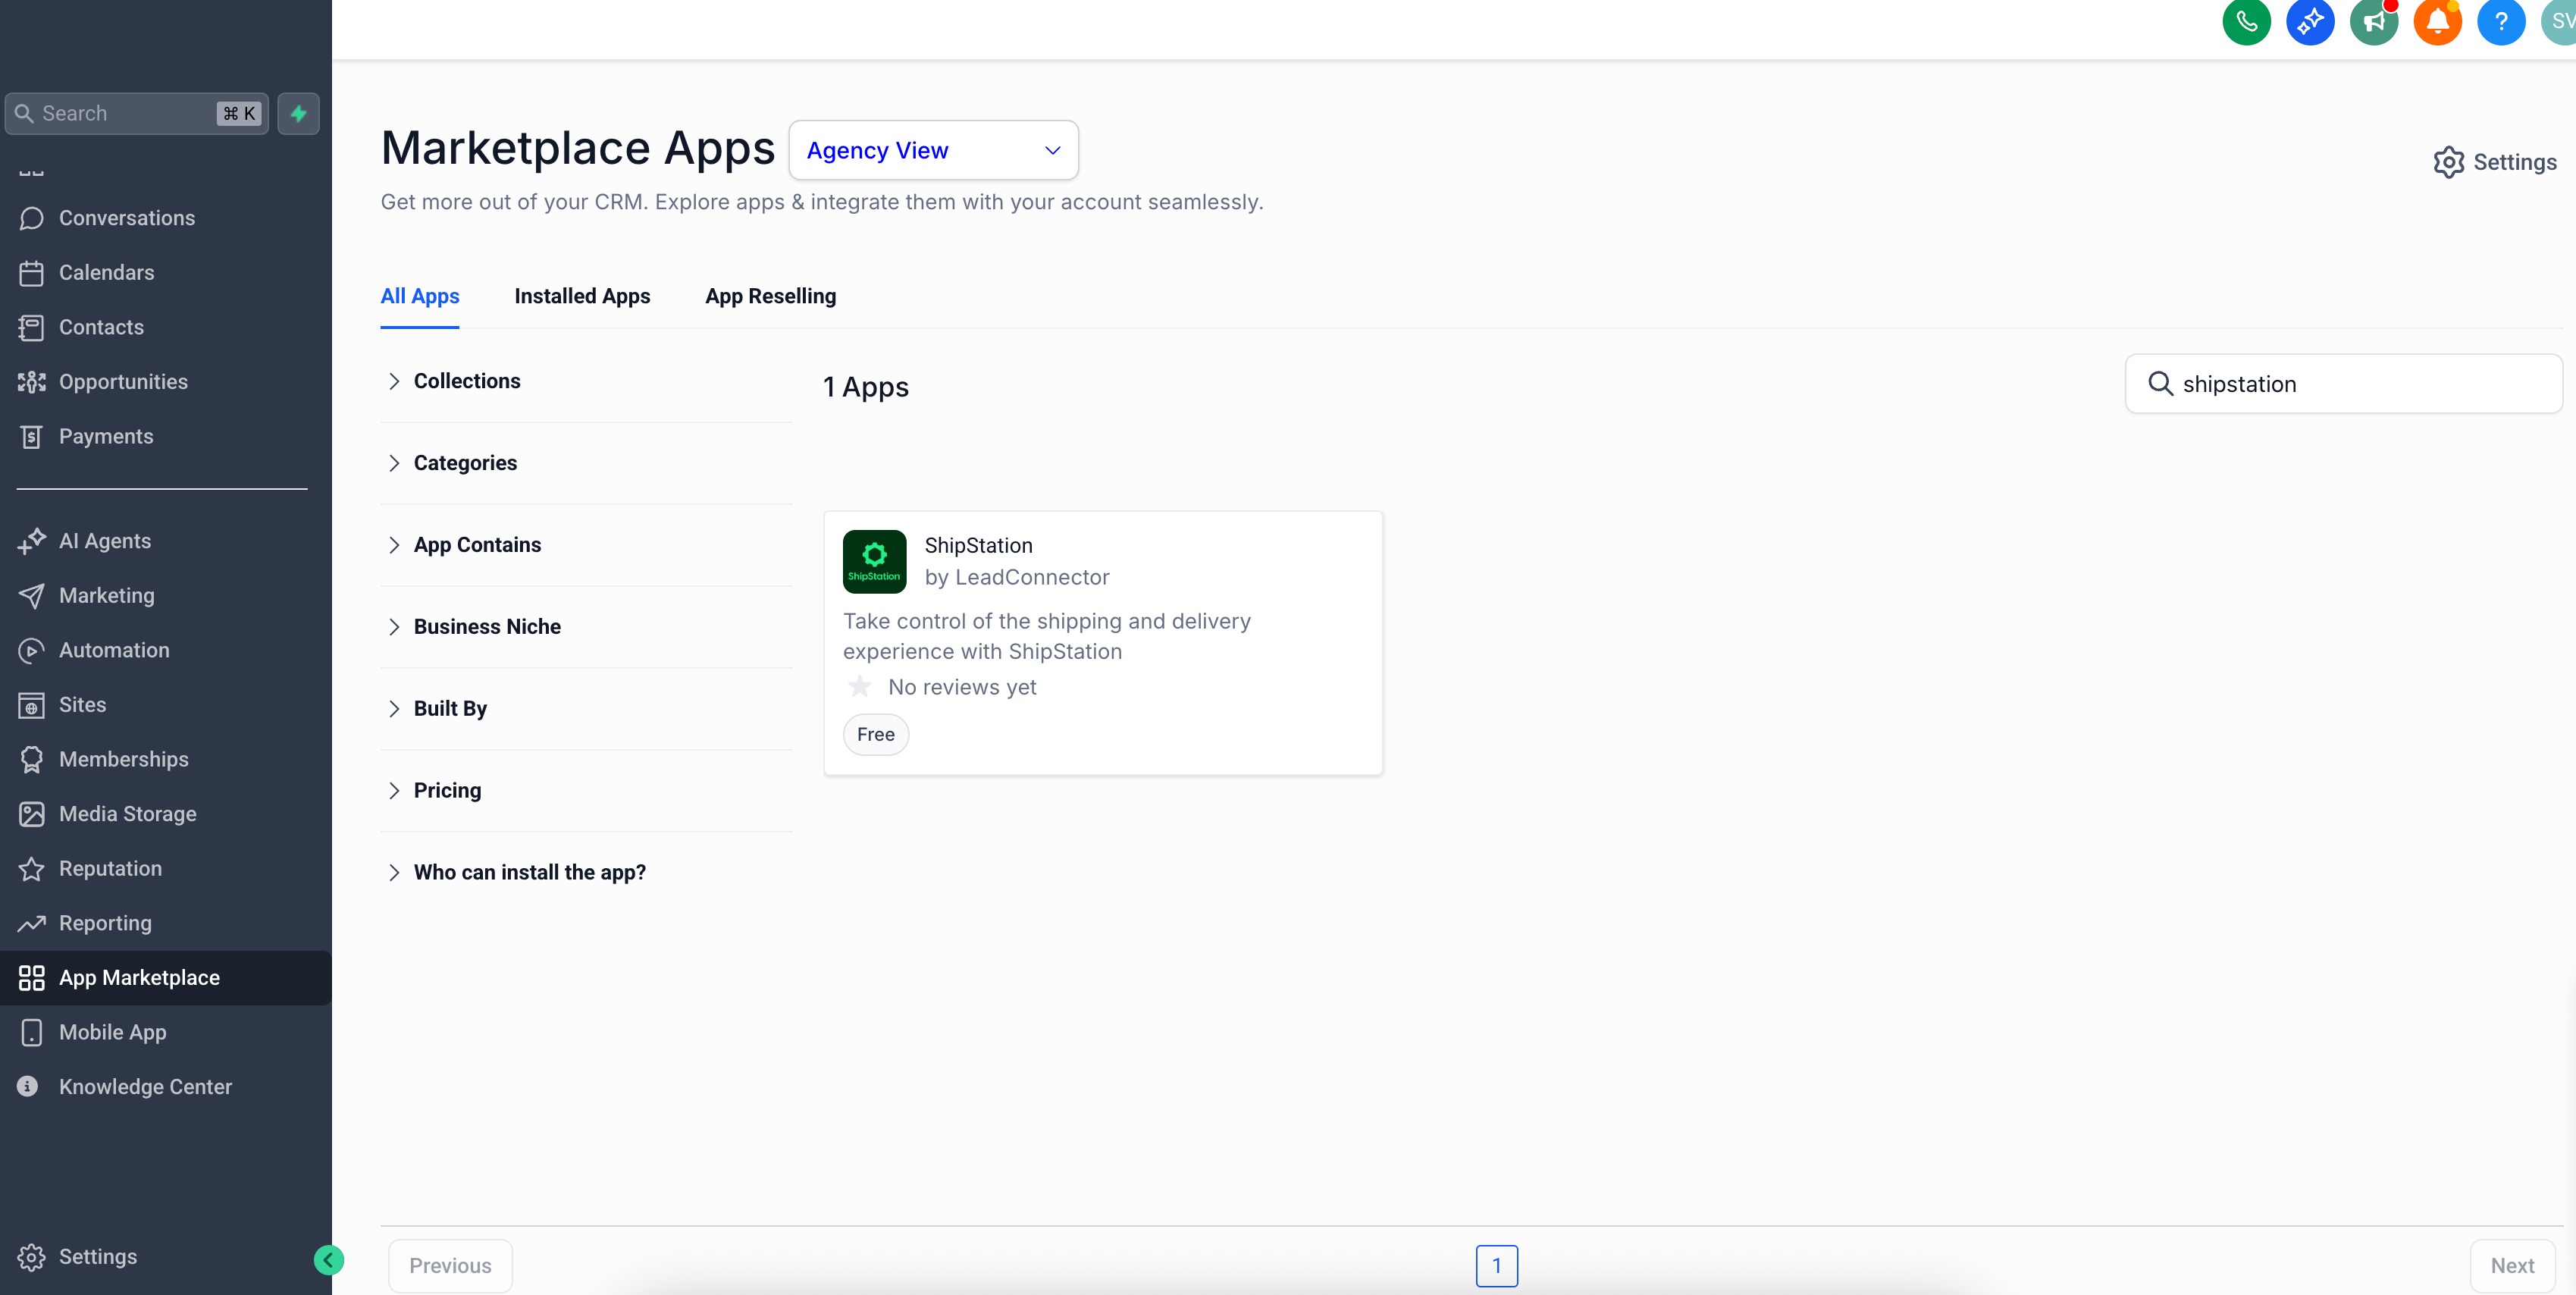
Navigate to the App Marketplace (or Integrations Page) in your sub-account.
Search for ShipStation Integration by Hair Pro 360.
Click View App → Install.
Step 2: Connect Your Ship Station Account
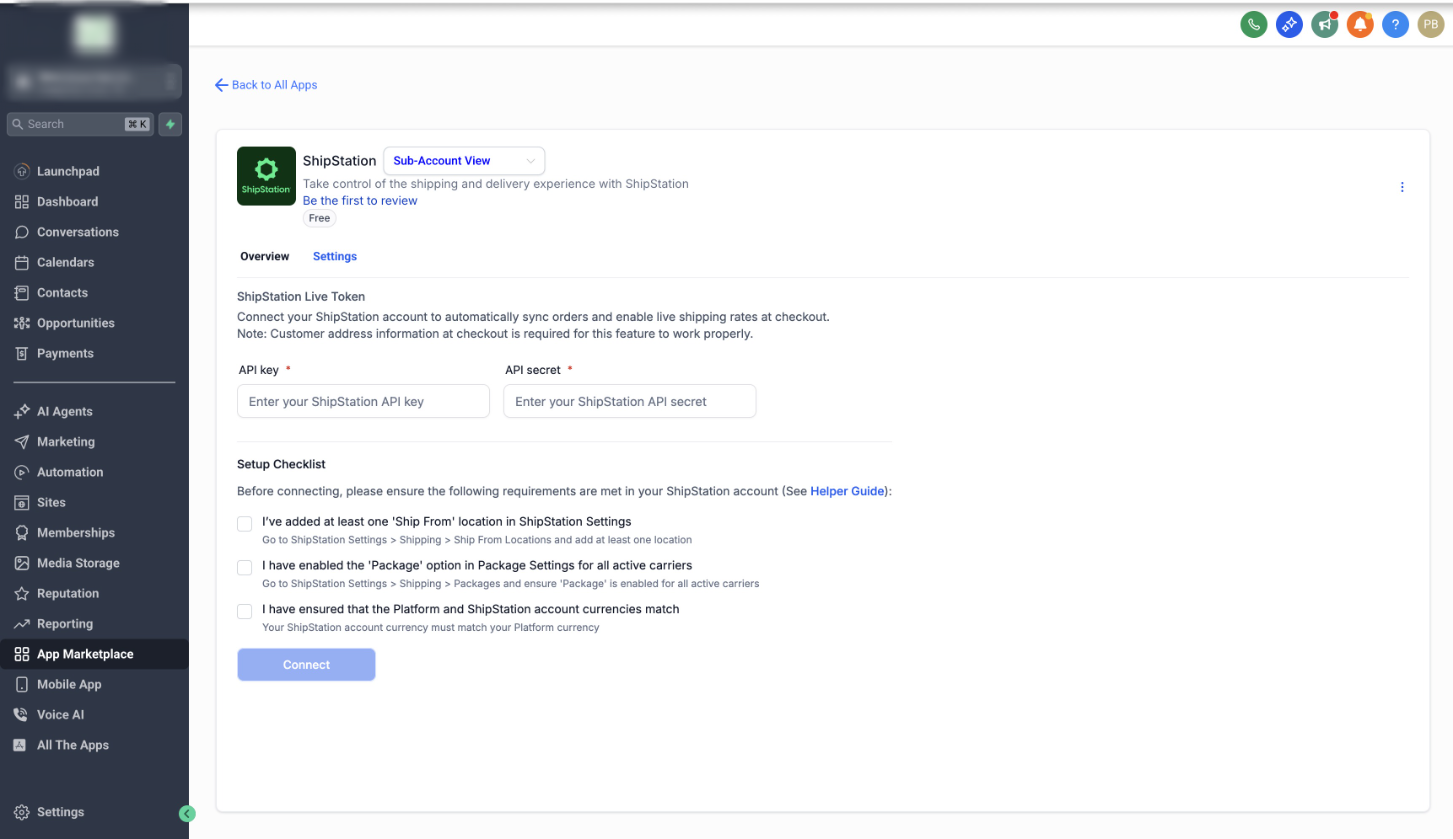
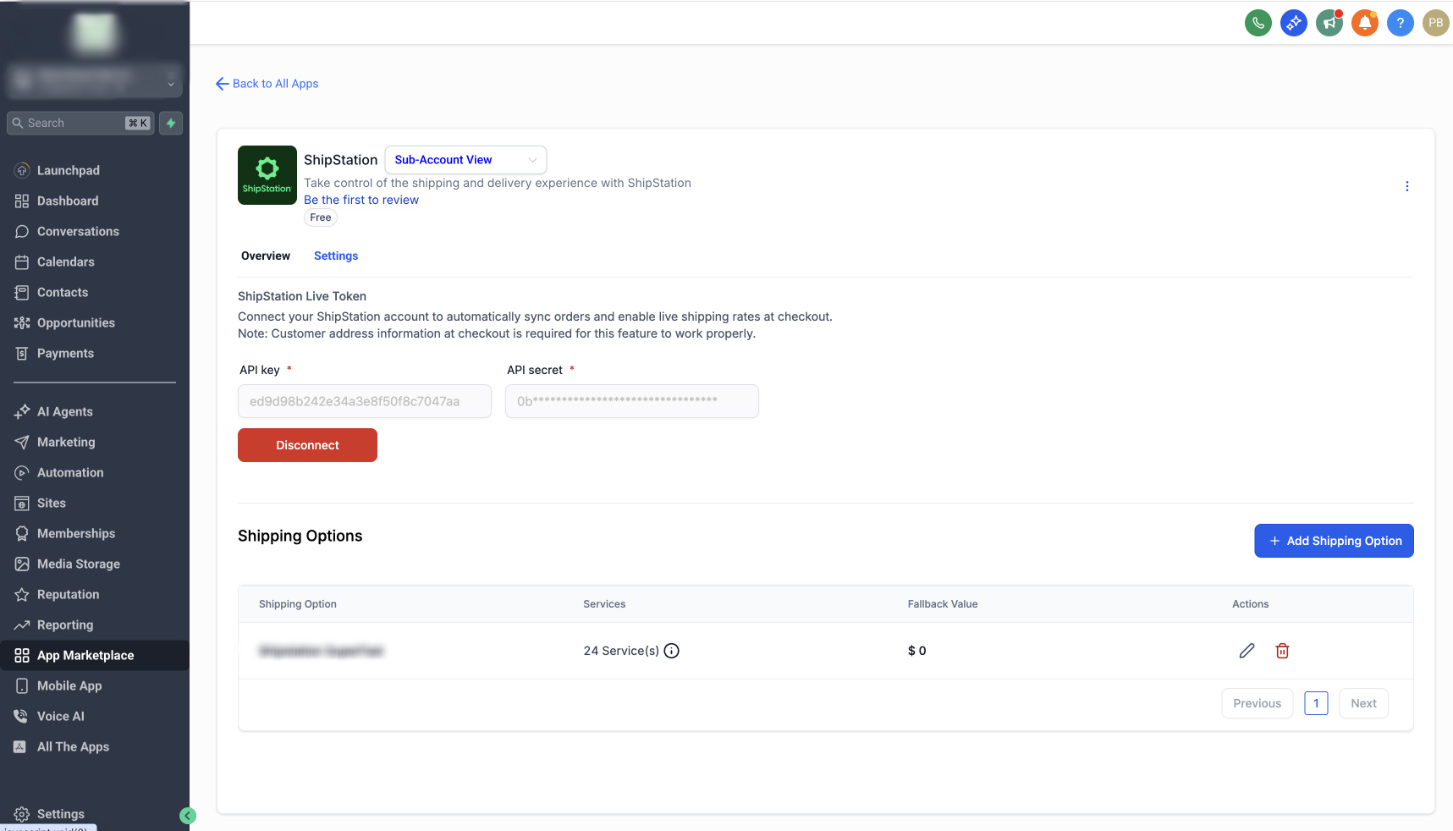
Go to the Settings tab in the ShipStation app inside the Platform.
Enter your ShipStation Live API Key and API Secret.
Generate these from your ShipStation account under:
Settings → Account → API Settings.
Click Connect.
Important: Use the Live Token only. Test tokens are not supported.
Step 3: Complete the Setup Checklist
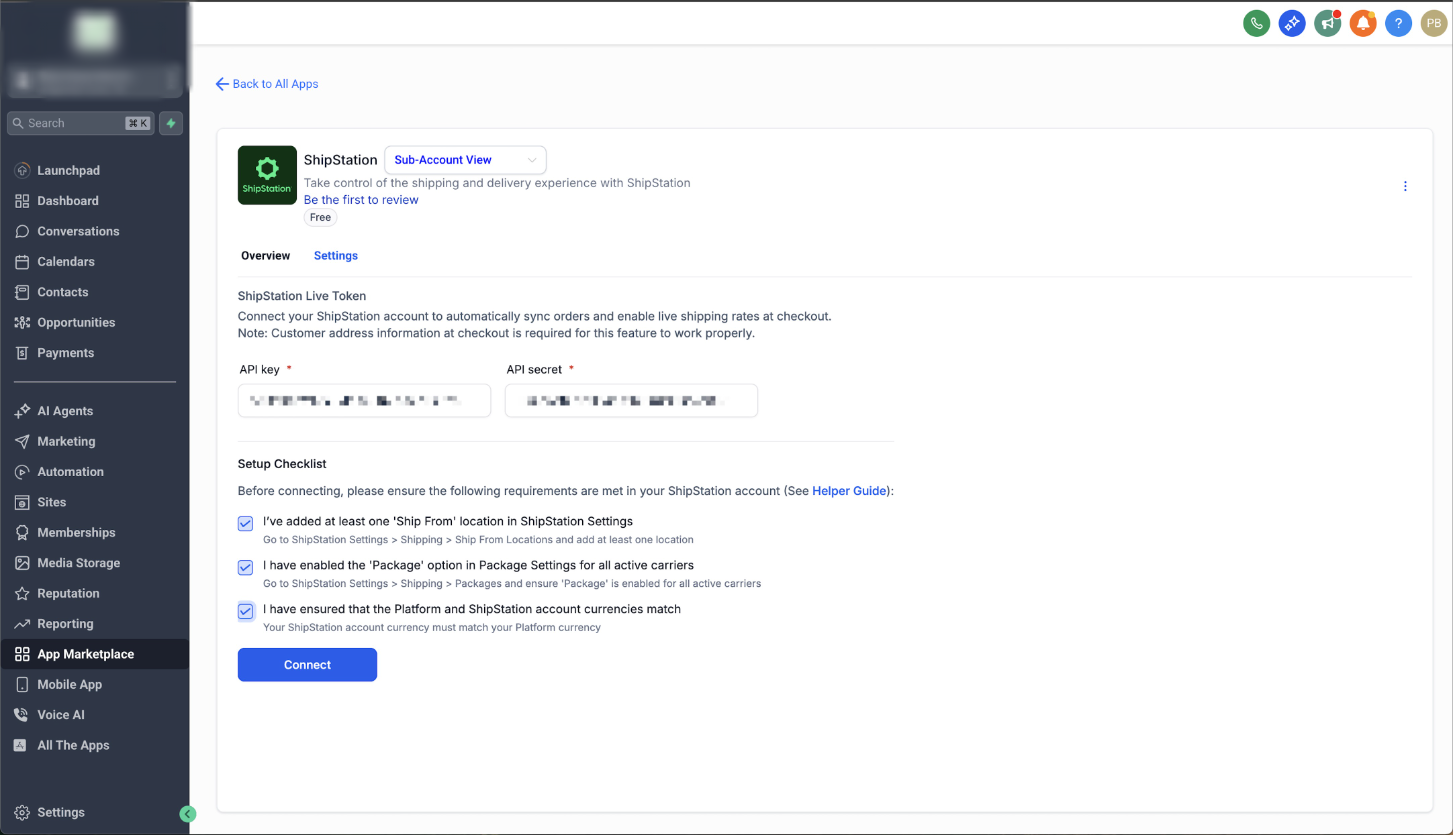
Before connecting, ensure the following requirements are met in your ShipStation account:
At least one "Ship From" location is created.
(ShipStation → Settings → Shipping → Ship From Locations)The Package option is enabled for all active carriers.
(ShipStation → Settings → Shipping → Packages)Your ShipStation account currency matches the Platform store currency.
Once completed, check the boxes and click Connect.
Step 4: Add Shipping Options
After connecting, configure shipping options to enable live rates:
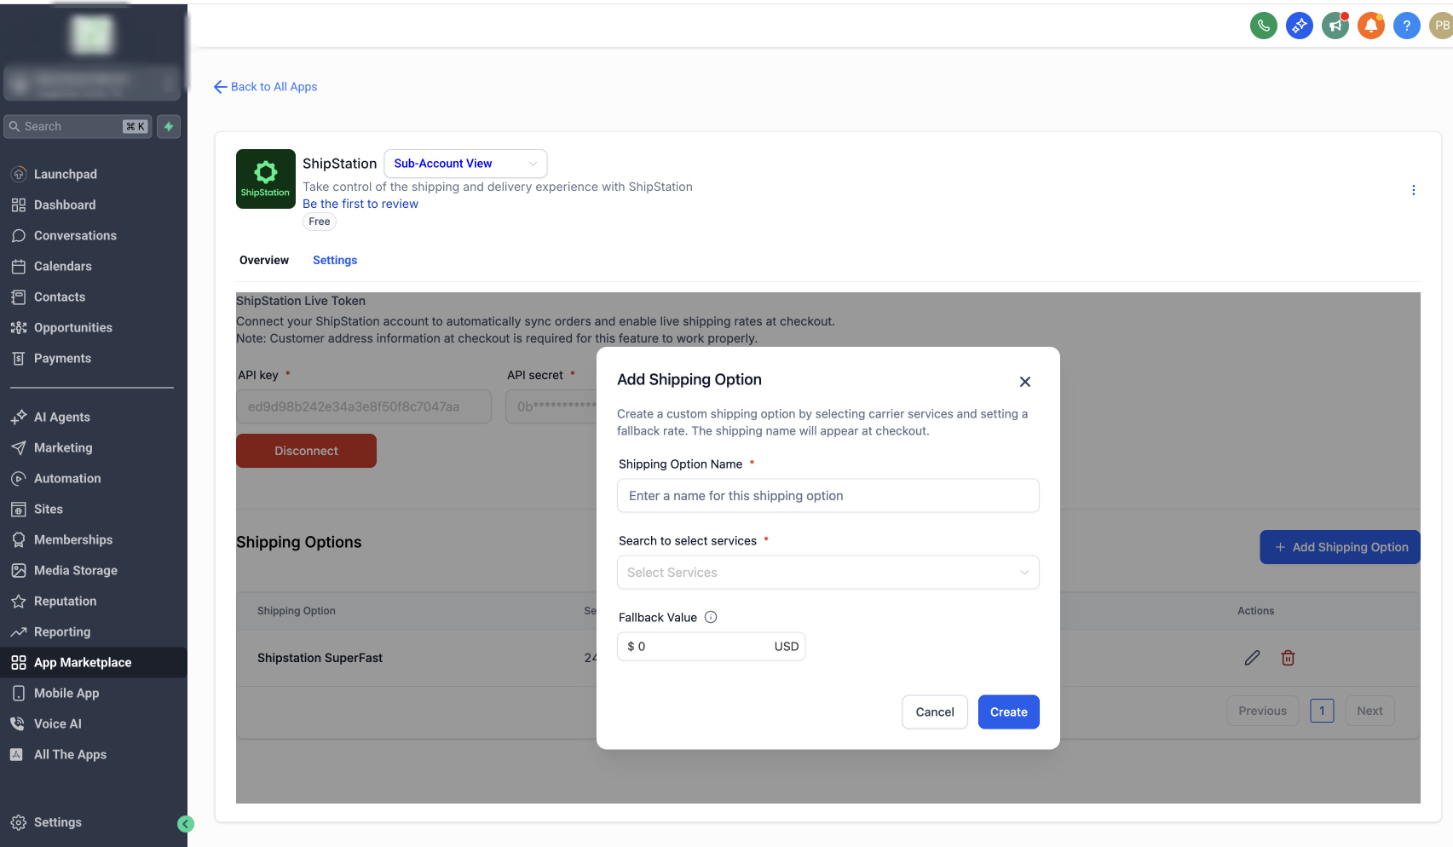
Click + Add Shipping Option.
Enter a Shipping Option Name (this will display at checkout).
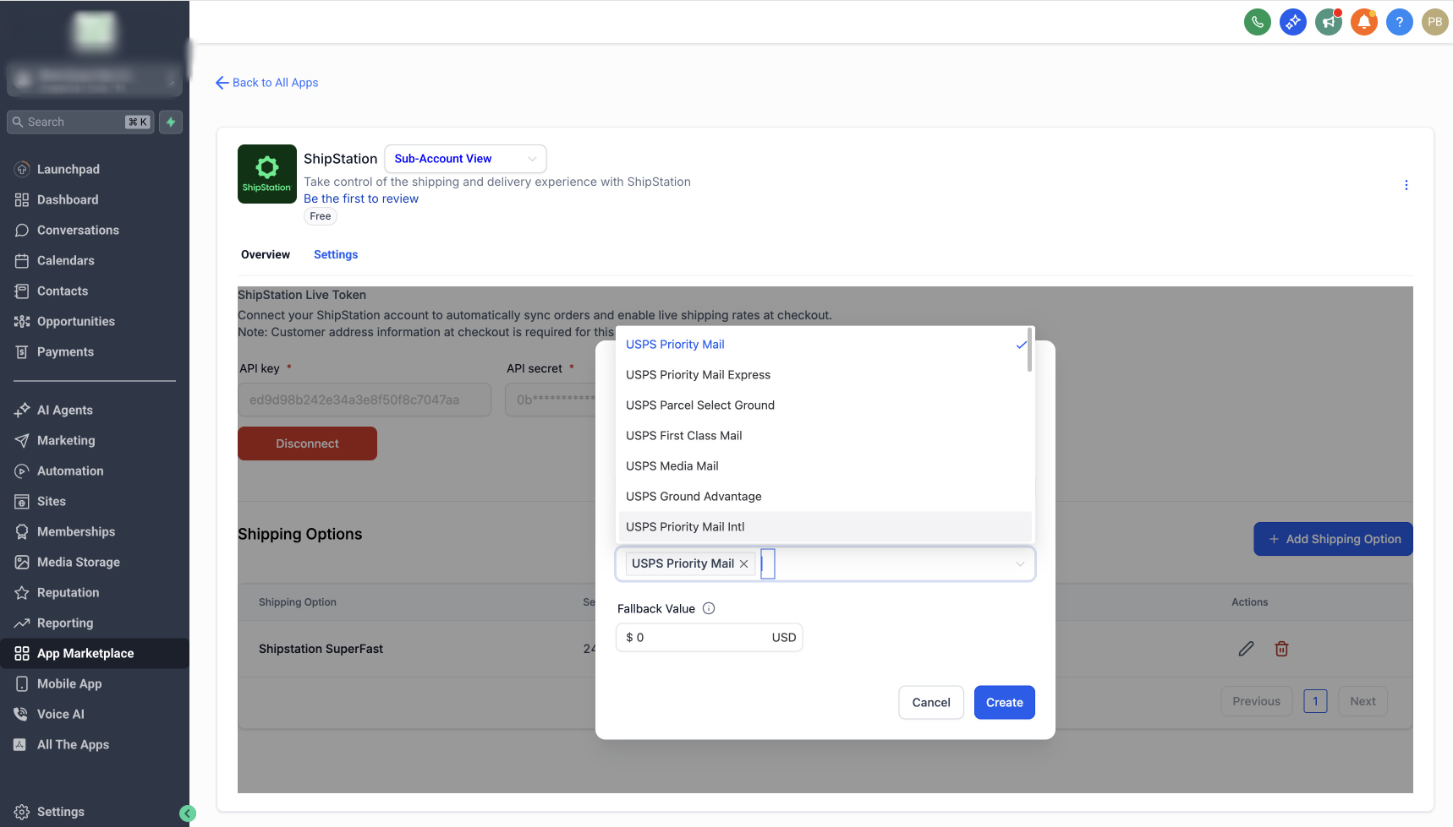
Select one or more carrier services (e.g., USPS Priority Mail, UPS Ground, FedEx 2Day).
Set a Fallback Value (flat rate used if live rates are unavailable).
Click Create.
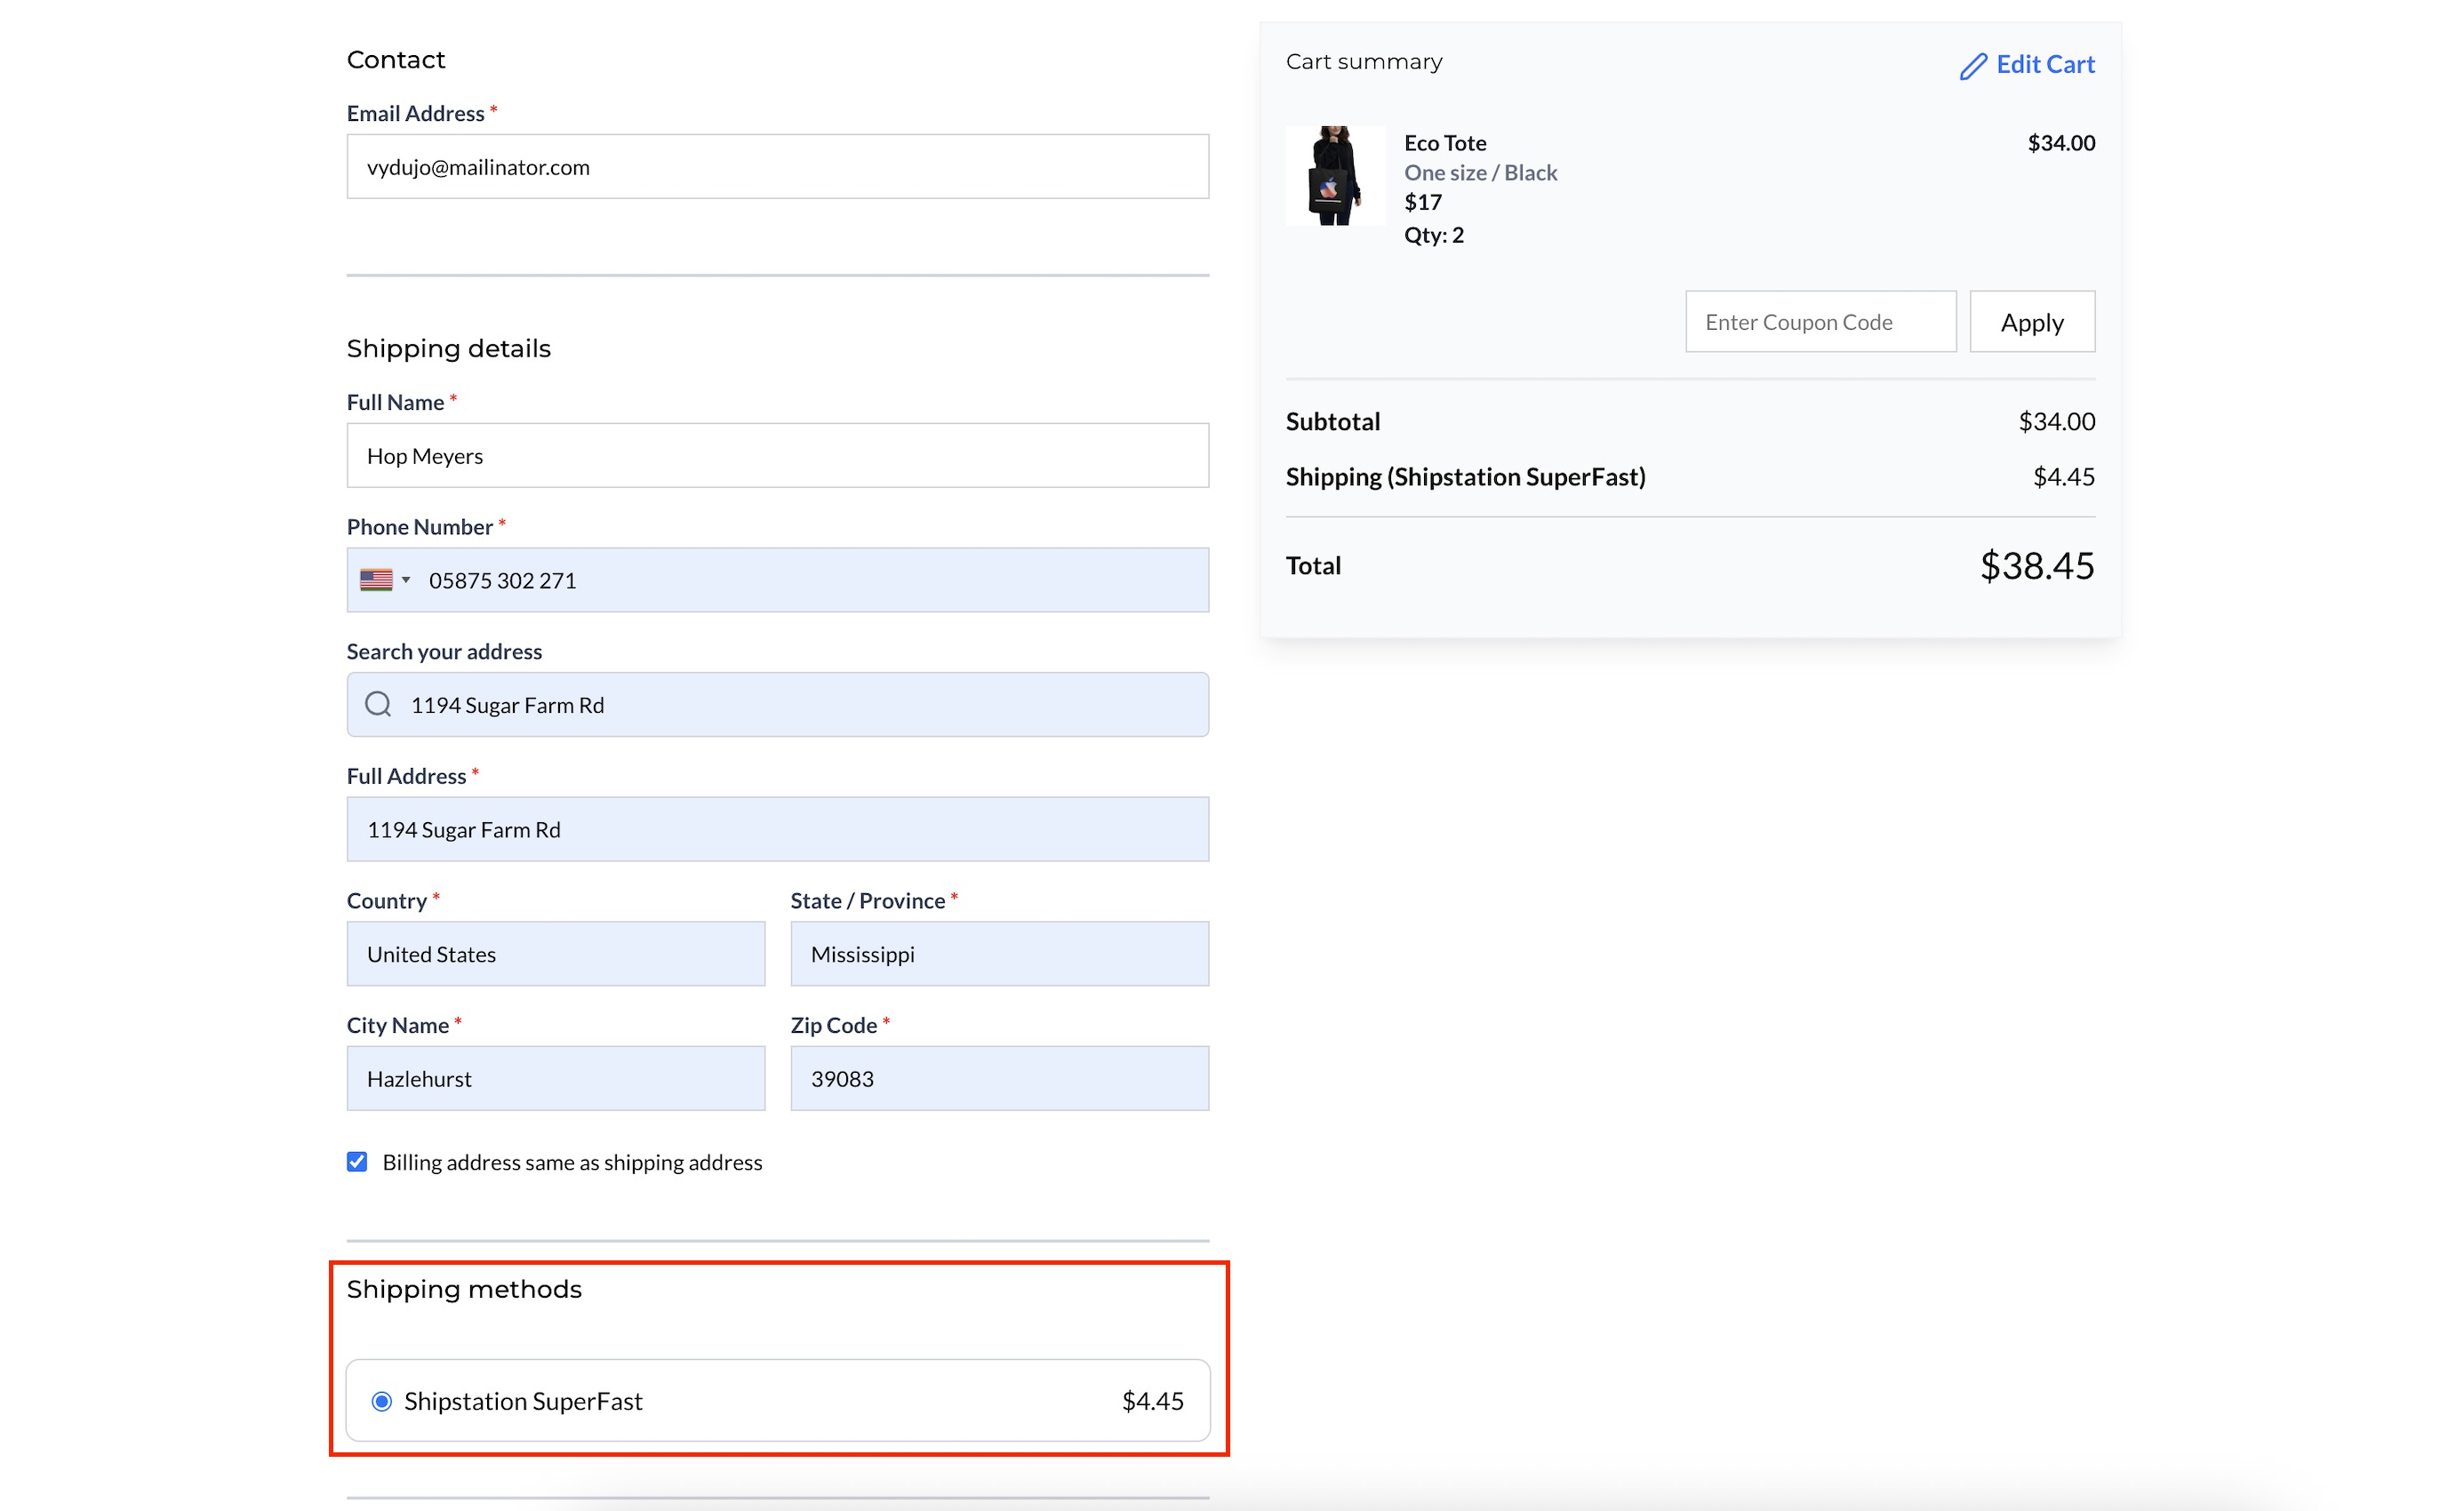
Your configured shipping methods will now display in the checkout process.
Step 5: Test the Checkout Flow
Go to your store’s Checkout Page.
Add a product to cart and proceed to the shipping step.
The ShipStation-powered live rates will display (with fallback rates applied if needed).
Step 6: Fulfillment & Tracking
Orders automatically sync to your ShipStation Dashboard.
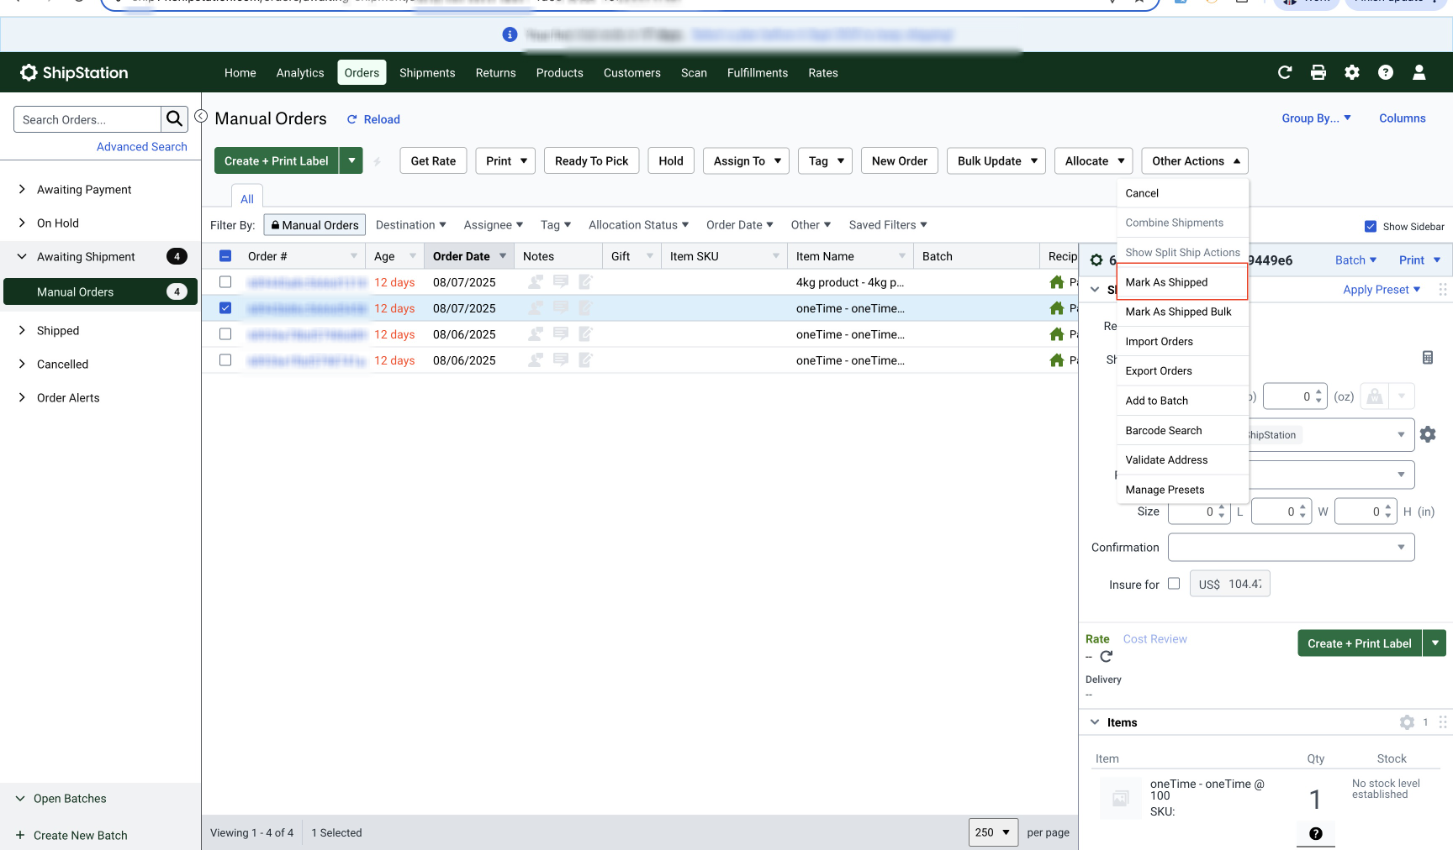
Generate and print labels, mark orders as shipped, and manage fulfillment directly in ShipStation.
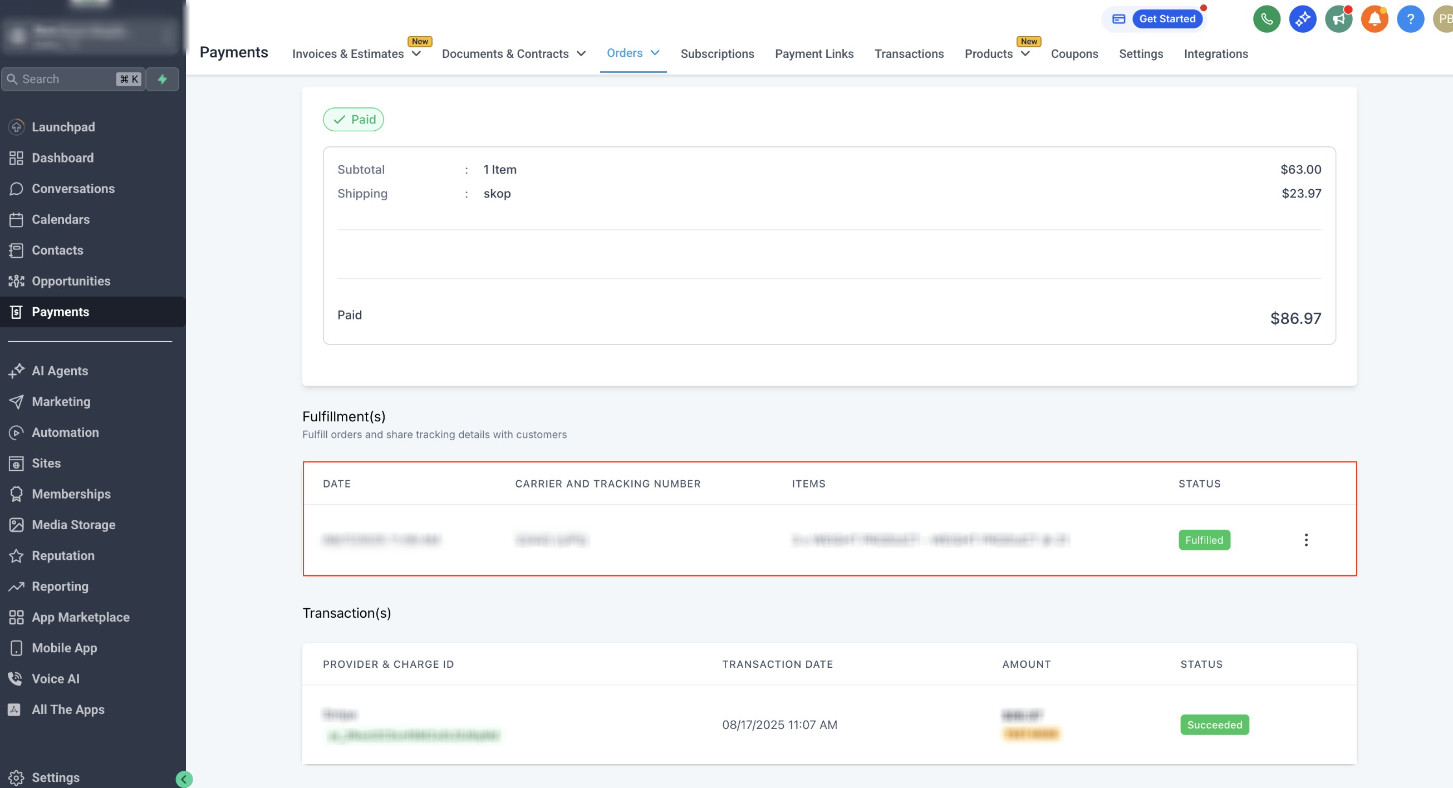
Tracking numbers sync back to the Platform and are shared with customers via branded notifications.
(Refer to Screenshot: Orders in ShipStation + Fulfillment in Platform)
Key Notes
Customer shipping address at checkout is required for live rates to calculate.
Ensure ShipStation has active carriers configured for rates to display.
Multiple shipping options can be created to represent Standard, Express, or Custom shipping tiers.